Meshing
Studied case
The case used in this workshop is a free floating weather buoy in infinite water depth. The buoy is a cylinder of radius \(R_1=3.0\) m and height \(T_d=1.25\) m, on top of a truncated cone of small radius \(R_2=2.5\) m and height \(T_{dd}=0.75\) m. The total draft is \(T_d+T_{dd}=2.0\) m.
Note
Only the underwater part is modelled.
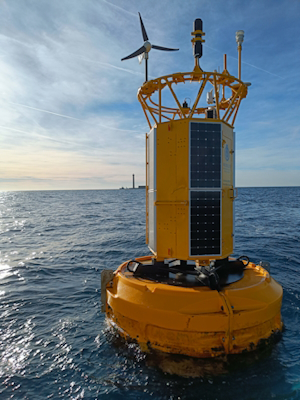

Fig. 2 Buoy example (source: Météo-France) and studied underwater geometry
Creating the mesh with GMSH
Geometry file
The geometry of the buoy is defined in the file Buoy.geo in the geometry folder.
This file is written in the GMSH scripting language.
The geometric parameters are defined at the beginning of the file, such as the radii \(R_1\), \(R_2\), the draft \(T_d\) and the draft of the truncated cone \(T_{dd}\).
The mesh size is defined by the variable cl1 (characteristic length) and is set to 0.3 m by default.
Note
We only model half of the buoy, as the geometry is symmetric with respect to the xOz plane. This reduces the computational cost.
Loading the geometry in GMSH
In GMSH, use the File -> Open menu to load the Buoy.geo file.

The geometry should appear in the main window. You can zoom in and out using the mouse wheel, rotate using the left mouse button, and pan using the right mouse button.
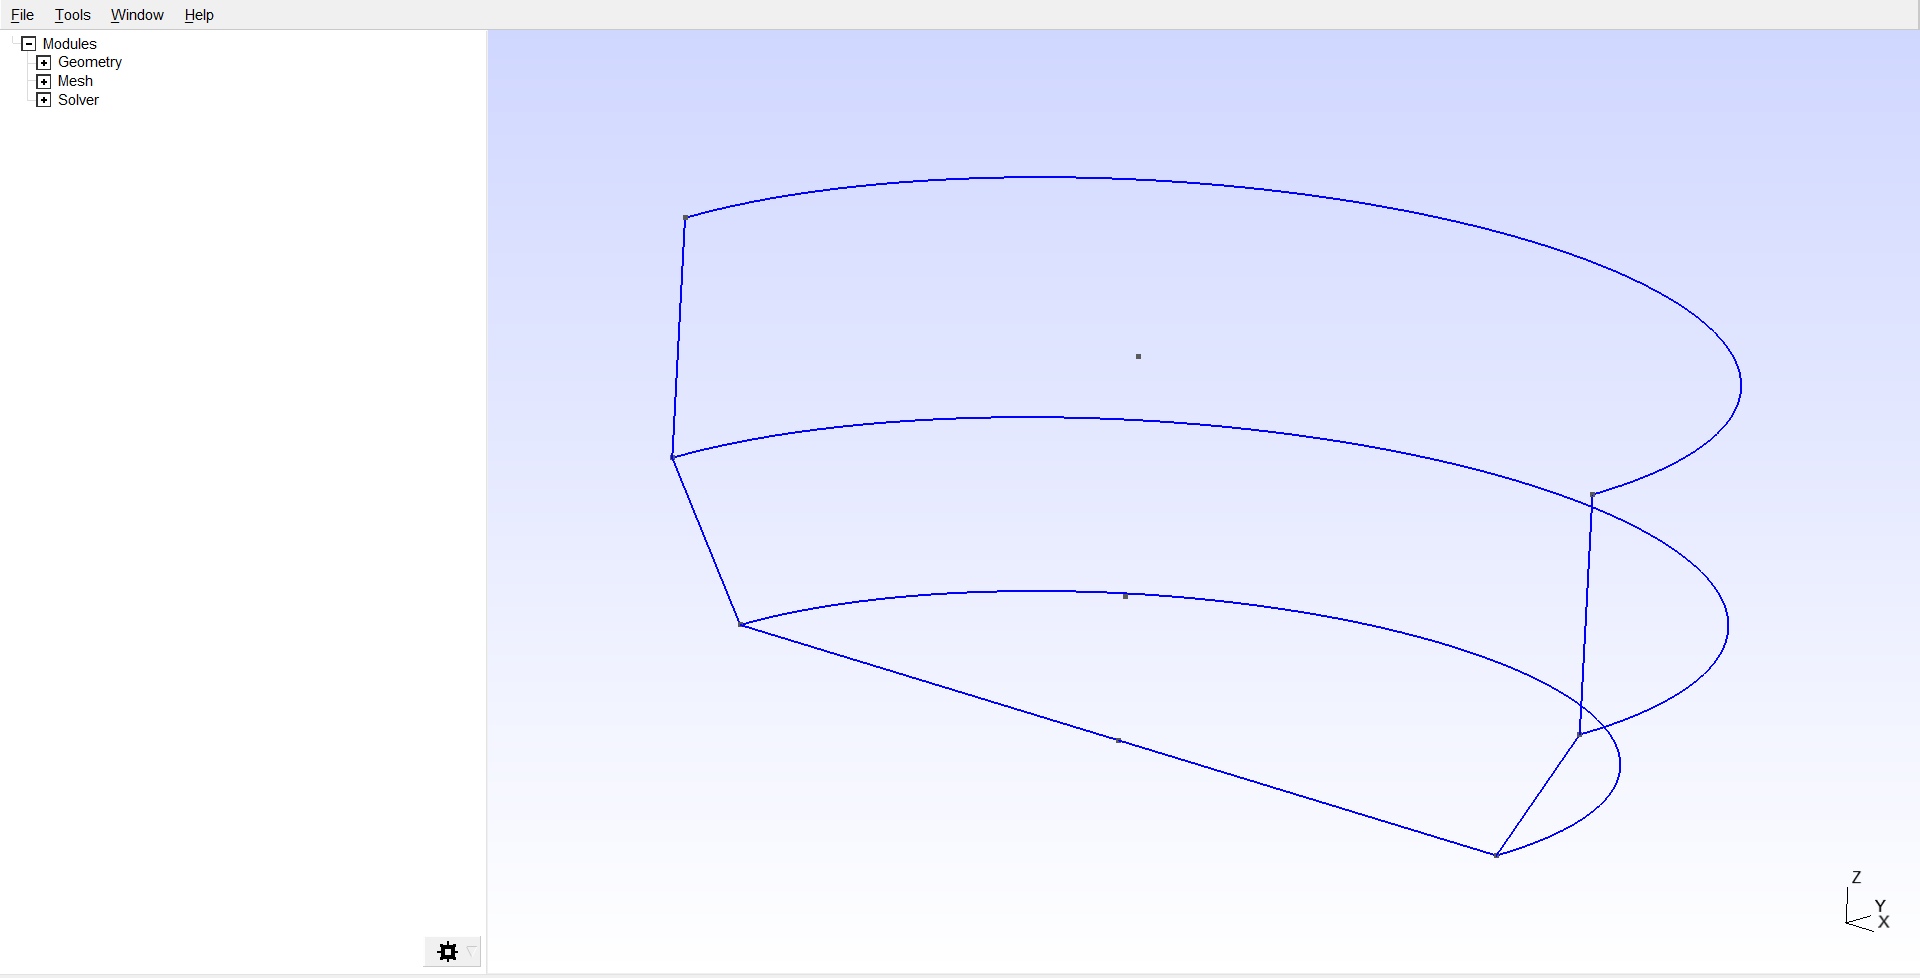
Generating the mesh
To mesh the geometry, click on the Mesh -> 2D button on the left.
You will need to expand the Mesh menu to see the 2D button.

The mesh should appear in the main window, where you can inspect it.
Checking the normals
To check the normals of the mesh, open the options with the Tools -> Options menu.
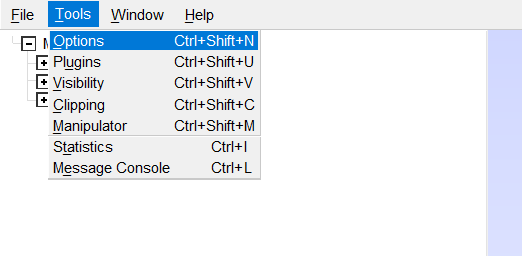
Navigate to the Mesh tab on the left and to the Visibility tab on the right.
Then, set a value in the Normals field.
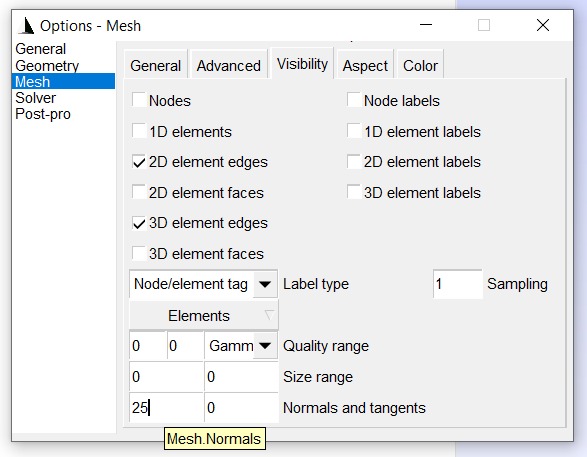
The normals should appear on the mesh in the main window.
You can adjust the size of the normals by changing the value in the Normals field.
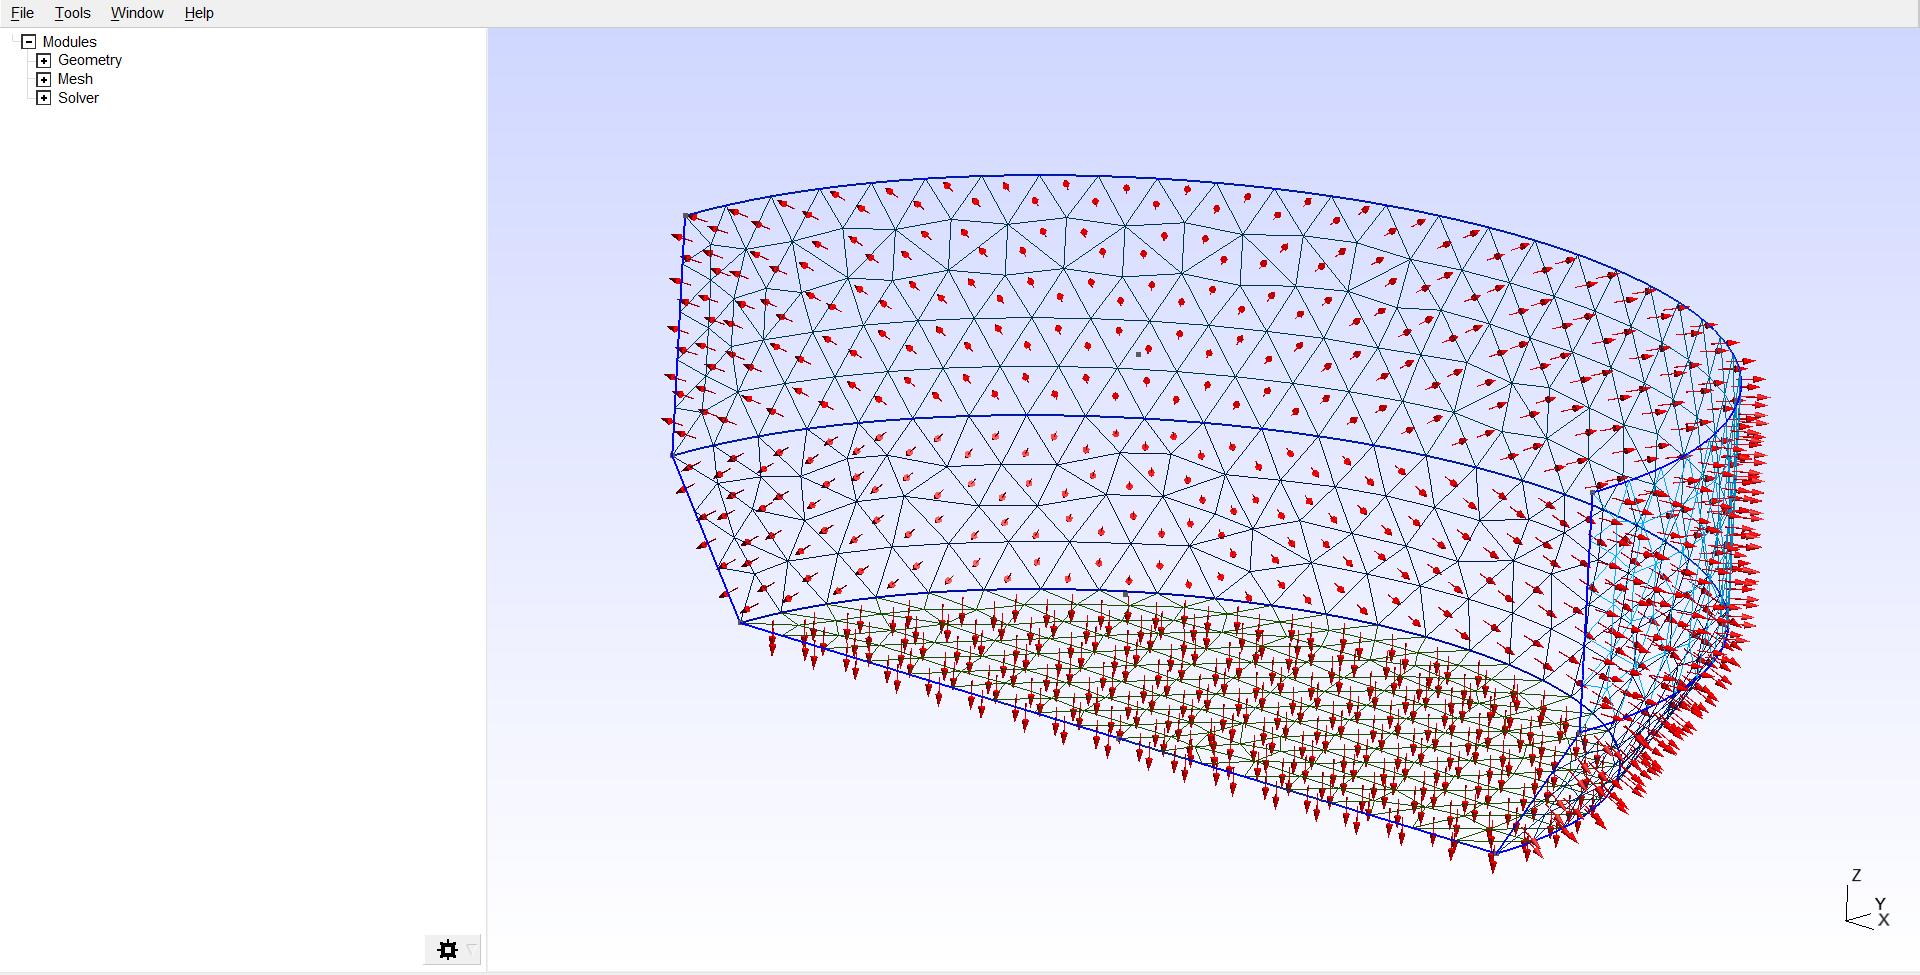
Warning
For Nemoh, the normals should point towards the fluid, that is outwards of the body.
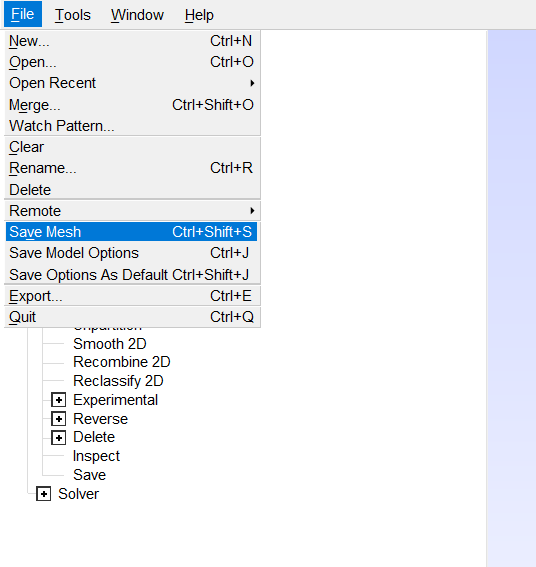
Saving the mesh
Save the mesh using the File -> Save Mesh menu.
This saves the mesh in GMSH’s .msh format, which cannot be used directly by Nemoh.
Alternatively, you can save the mesh in other formats such as .stl or .vtk using the File -> Export menu.
Modifying the mesh size and/or geometry
You can modify the mesh size by changing the value of cl1 in the Buoy.geo file.
After modifying (and saving) the geometry file, reload it in GMSH and re-mesh the geometry.
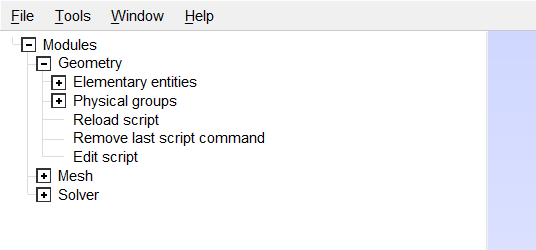
To reload a modified geometry file, click on the Geometry -> Reload script button on the left.
Like for the meshing, you will need to expand the Geometry menu to see the Reload script button.
Mesh using the commmand line
Rather than using the graphical interface, you can also mesh the geometry using the command line:
$ gmsh geometry/Buoy.geo -2
The name of the output file can be specified with the -o option:
$ gmsh geometry/Buoy.geo -2 -o geometry/Buoy.msh
Converting the mesh with Meshmagick
Simple mesh conversion
The mesh generated by GMSH is in the .msh format, which cannot be read by Nemoh as-is.
To convert the mesh to a format that Nemoh can read, use Meshmagick.
First, open a terminal and navigate to the project folder:
$ cd <path/to/project>
Then, run the following command to convert the mesh to the .mar format:
$ meshmagick geometry/Buoy.msh -o Buoy.mar
Meshmagick also allows you to convert the mesh to other formats such as .stl or .vtk. See Meshmagick’s documentation for more information.
Setting the symmetry switch
If only half the geometry was modelled (as is the case here), you need to set the symmetry switch in the header of the mesh file.
In order for Nemoh to consider the mesh as only half of the geometry, the second number of the header must be set to 1 (e.g. 2 1):
     2     1
     1        3.000000        0.000000        0.000000
     2        3.000000        0.000000       -1.250000
     3        2.500000        0.000000       -2.000000
     4        0.000000        0.000000       -2.000000
Additional Meshmagick features
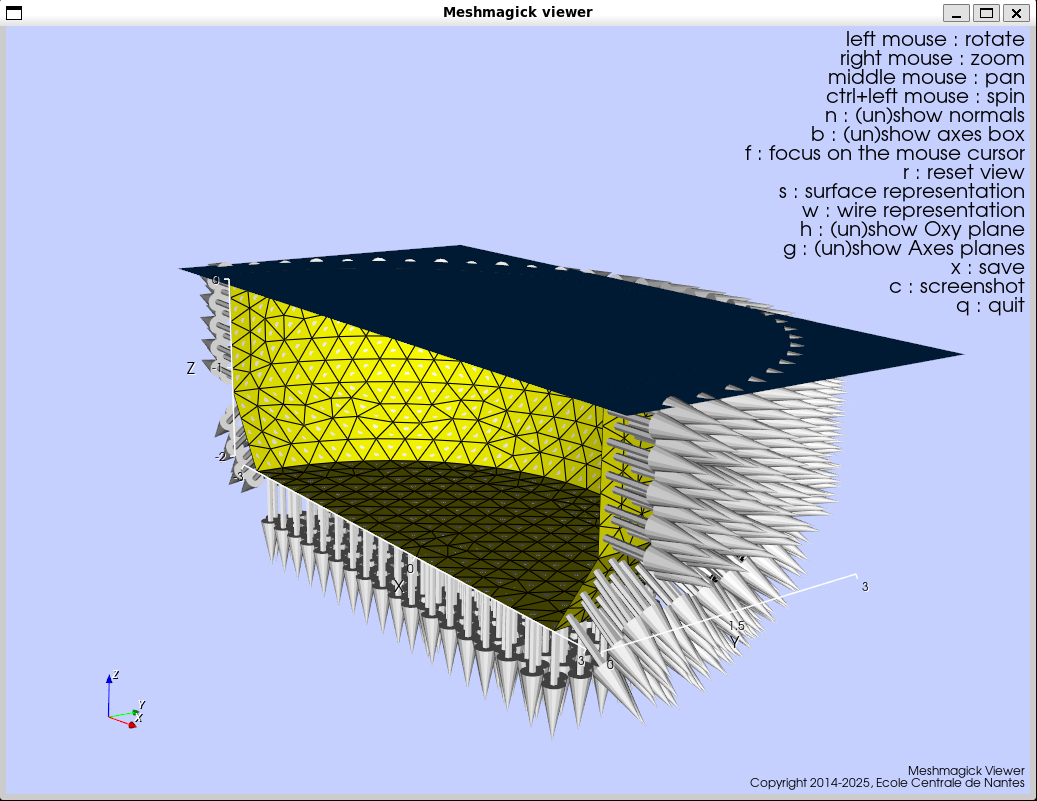
You can inspect the mesh with Meshmagick using the --show option:
$ meshmagick Buoy.mar --show
A windows should open displaying the mesh.
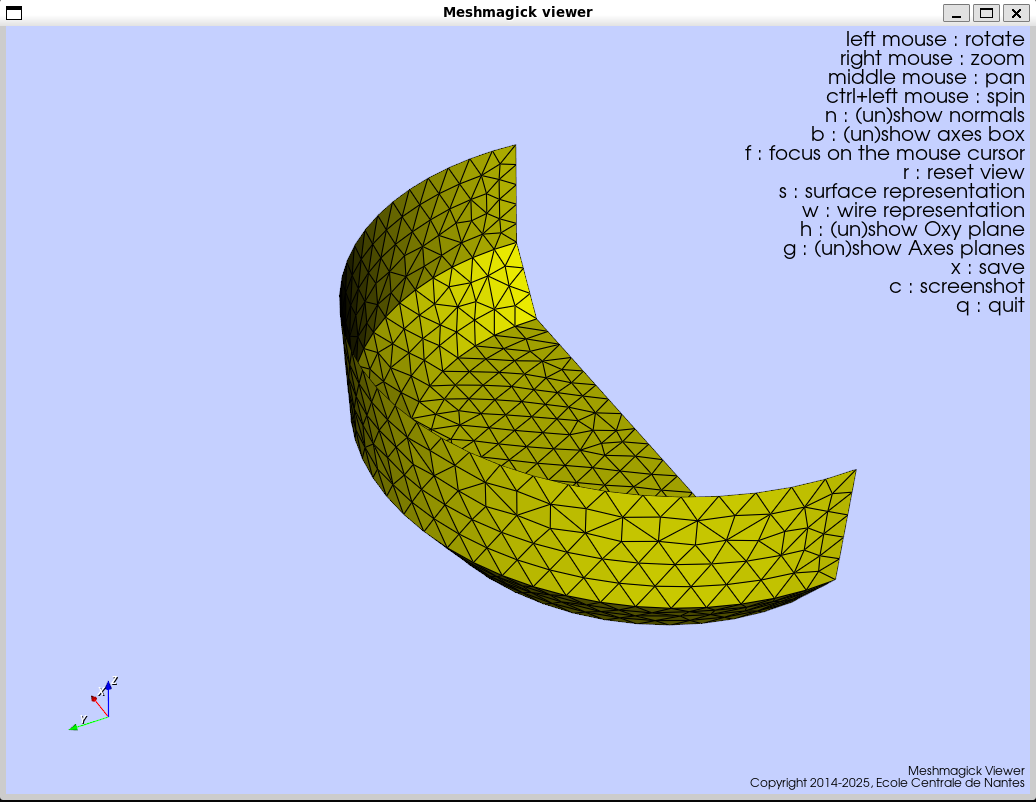
Among other things, you can display the normals, the xOz plane and the bounding box with scales by hitting the n, h and b keys respectively.
This allows to check once agains that the normals of the mesh point outwards.
Meshmagick offers many other options to manipulate the mesh and analyse it. Display them with the --help option:
$ meshmagick --help
For example, you can show basic information about the mesh with the --info option:
$ meshmagick Buoy.mar --info
This prints a summary of the mesh, including the number of vertices, triangles and the bounding box.
=============================================
meshmagick - version 3.4
Copyright 2014-2025, Ecole Centrale de Nantes / D-ICE Engineering
=============================================
geometry/Buoy.msh successfully loaded

        --------------------------------------------
                MESH NAME : Buoy
        --------------------------------------------

        Number of vertices: 470
        Number of faces:    872

        Number of triangles:   872
        Number of quadrangles: 0

        xmin = -3.000000        xmax = 3.000000
        ymin = 0.000000 ymax = 3.000000
        zmin = -2.000000        zmax = 0.000000


=============================================================
Meshmagick - version 3.4
Copyright 2014-2025, Ecole Centrale de Nantes / D-ICE Engineering
Maintainer : Francois Rongere <Francois.Rongere@dice-engineering.com>
Good Bye!
=============================================================
The mesh is now ready to be used in Nemoh.